Prepare for the Meeting
When you have agreed a time to meet, schedule the meeting using your Teams or Outlook calendars. The meeting will be appear on both calendars with the link to join.
 They will not be able to enter the meeting room before the meeting because the Meeting option will put them in the lobby until you let them in. Or you can email them the link before the meeting starts.
Accessing the meeting options will be different depending on which app you use to schedule the meeting, but you can access the options from both apps.
The links below to Microsoft training will show how to use Outlook and Teams to schedule a Teams meeting, using the web, Android, Windows desktop and Mac.
Schedule a Teams meeting from:
Set Meeting Options
In Teams
1. In Teams open your calendar. Click on the meeting it to edit.
2. Select Meeting Options. Shown below. (you may have to select the three dots, the More option.

2. You will be taken to a web page and you may have to enter your St. George’s email and password.
3. Set the Meeting Options as shown below.
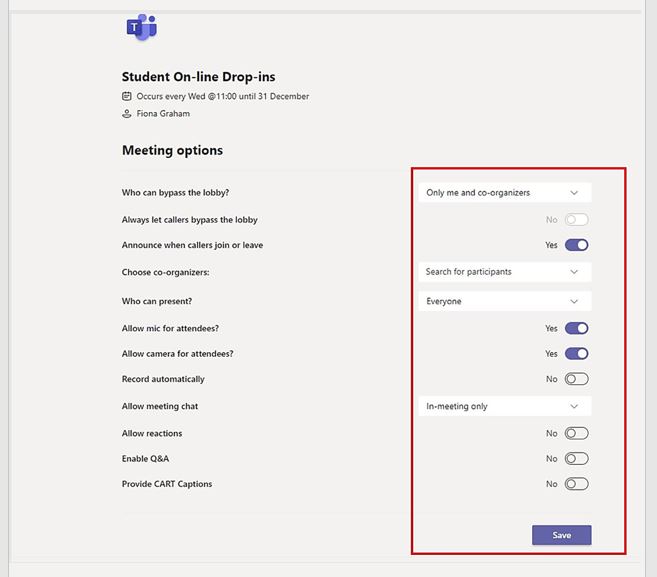
4. Click Save.
5. Close the meeting option tab.
6. In Teams close the scheduled meeting window.
In Outlook
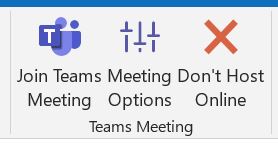
- Select Meeting Options in the Teams Meeting group on the ribbon.
2. Set the options as shown below.
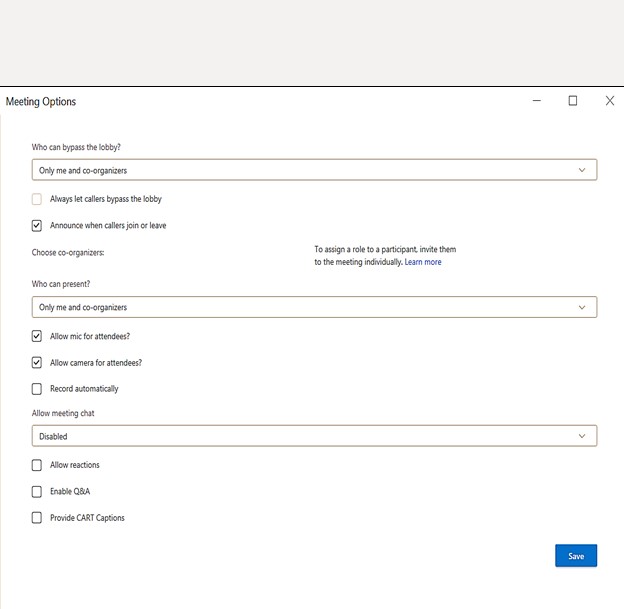
3. Click Save.
4. Click Send in Outlook, to save close the window.
Before the Meeting (emailing the link)
1. Go to calendar in Teams, click on the scheduled meeting. Click Edit.
2. Scroll down until you see the link to the meeting. Shown below.
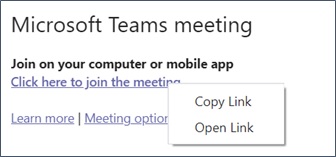
3. Right click on “Click here to join meeting” select Copy link.
4. Open your email and paste the link in a new message to the participant.
5. Add the participant’s email address with a message and click send.
Start Meeting In Teams
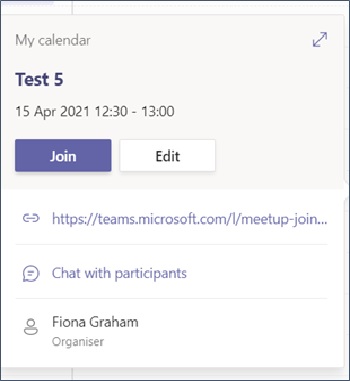
1. Go to Calendar and click on the pre-scheduled meeting. Click Join.
2. The meeting Audio window will appear. You can:
- Give the meeting a name
- Turn off your camera
- Turn on computer audio and microphone
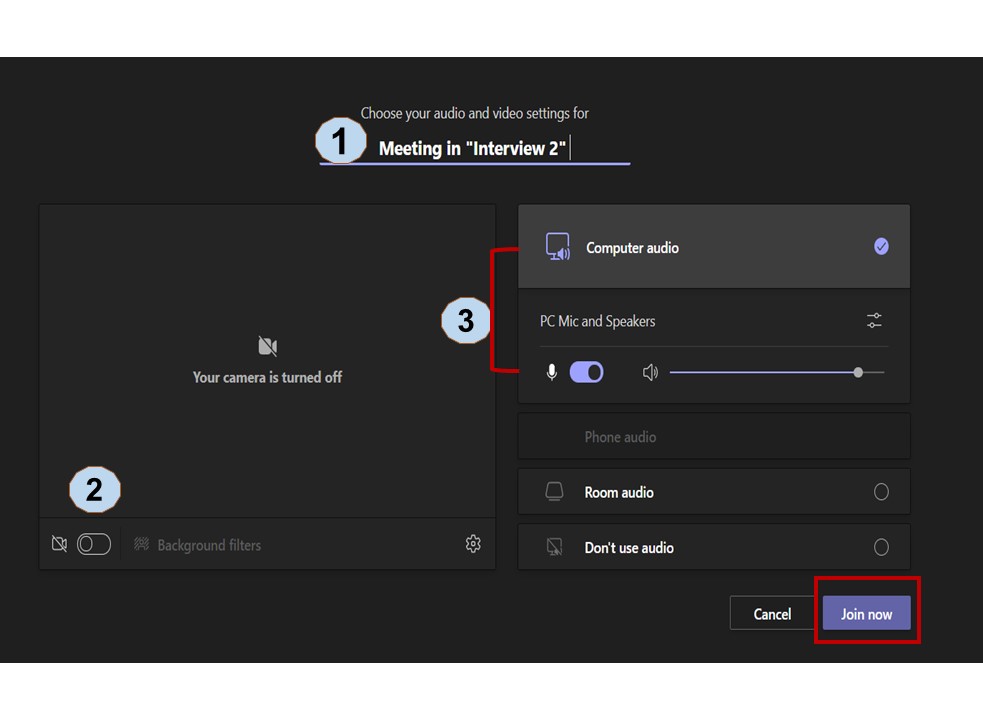
3. When you set the above settings, click Join now.
You will be taken to the meeting room and wait until the participant ask to be admitted from the lobby.
Note: When the participant clicks the URL, they will be taken to the lobby, where they will wait there until you allow them into the meeting.
4. You will see an alert that the participant is waiting in the lobby.
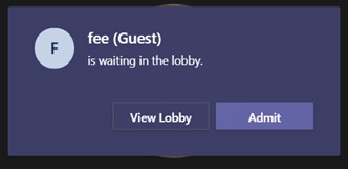
5. Click Admit to let them into the meeting.
Turn on Transcription
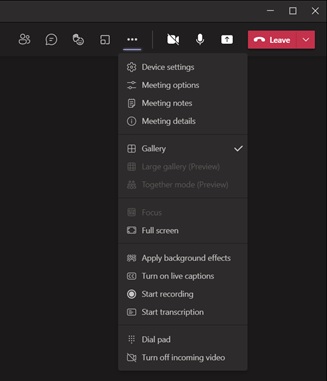
1. Click on More Actions, (…) the tree dots on the Meeting control bar.

2. Select Start transcription from the menu.
You and the participant will see a message letting you both know that transcription recording has started. You can stop and start the transcription recording during the meeting.
3. To close the transcription pane. Click the X , the top right of the Transcript pane.

4. To stop transcription recording. Click on More Actions (…) on the Meeting control.
5. Select Stop transcriptions from the menu. You and the participant will be informed that transcription has stopped.
End Meeting
1. On the meeting controls, click on the arrow next to Leave, click End meeting, then End.
2. You will be taken back to the Microsoft Teams screen.
Download Transcript
1. Click on Chat on the Navigation bar .
2. In the chat list you will see the name of the meeting. Click on the name.
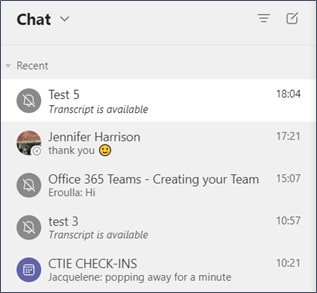
3. The meeting attendance and transcript will appear in the pane.
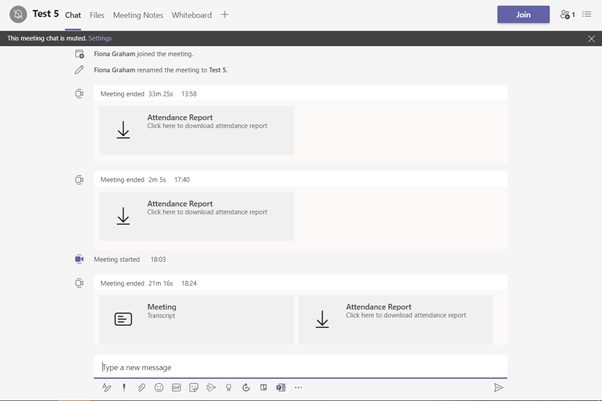
4. Click on Meeting transcript. You will be taken to another screen.
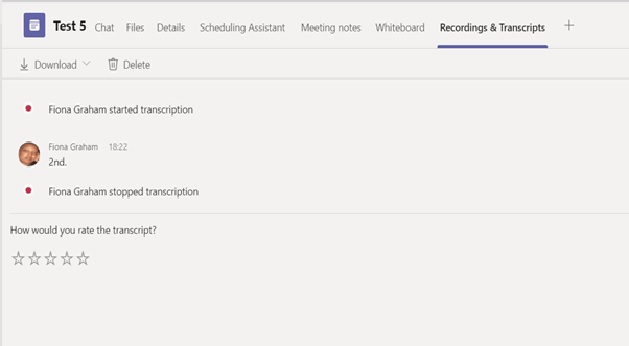
5. Select Download. Then select the format you want to download your transcription in.
The document will download to your Downloads folder on your PC or laptop.
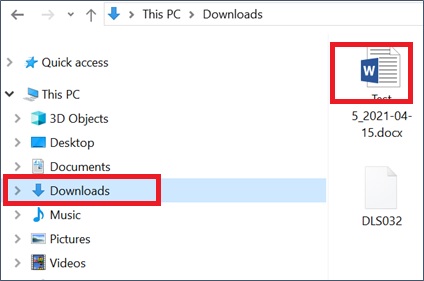
6. Go to your Downloads folder and move the Transcription to secure storage. Then delete the file from the Downloads folder.
Delete Meeting
When you are satisfied with your transcript you can delete the meeting from your calendar. This will also delete the transcript and attendance lists. They will still appear in the chat area but access to the transcript and attendance lists will no longer be available.
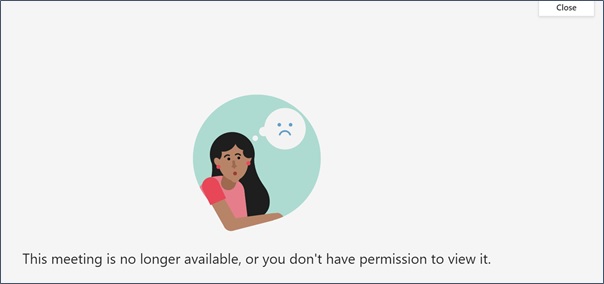
To Delete Meeting
1. Open the scheduled meeting on the Teams calendar.
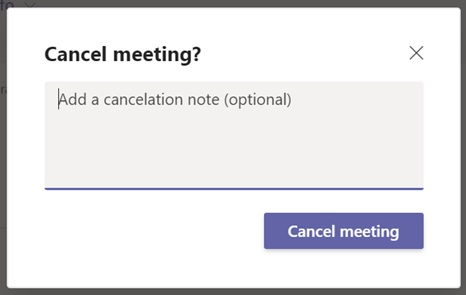
2. In the Meeting details screen, click Cancel Meeting top left.
3. Then Cancel Meeting again.
